Shopify (Legacy)
This documentation is for Extole's Legacy Shopify Integration. For the most up to date version of Extole's Shopify app integration, refer to https://dev.extole.com/docs/shopify.
Overview
This guide describes how Shopify, the ever popular eCommerce platform, and Extole easily work directly together. With these easy steps, you’ll see how rapidly Extole tags can be embedded into Shopify pages and conversion tracking can be enabled. Following these instructions can take as little as one hour.
Prerequisites
Getting started with implementing Extole on a Shopify site begins with making sure the following prerequisites are satisfied.
| Requirement | Description |
|---|---|
| Shopify Account | Access to and familiarity with the Shopify platform. |
| Shopify GitHub Access | Either your developer or Extole (if you’re taking advantage of our launch team) has access to your Shopify partner account and to the site’s GitHub repository. |
With access to the materials detailed above, the following sections will describe how you’ll match your refer-a-friend marketing plan and the corresponding onsite CTAs by implementing Extole marketing zone tags that will deliver that CTA creative to your site. Then, you’ll also learn how to set up Extole conversion tracking so that Extole rewards all issue properly and analytics are working properly.
Integration
Edit the Current or Development Shopify Theme
Once logged into Shopify, you will need to choose the appropriate theme to edit the code.
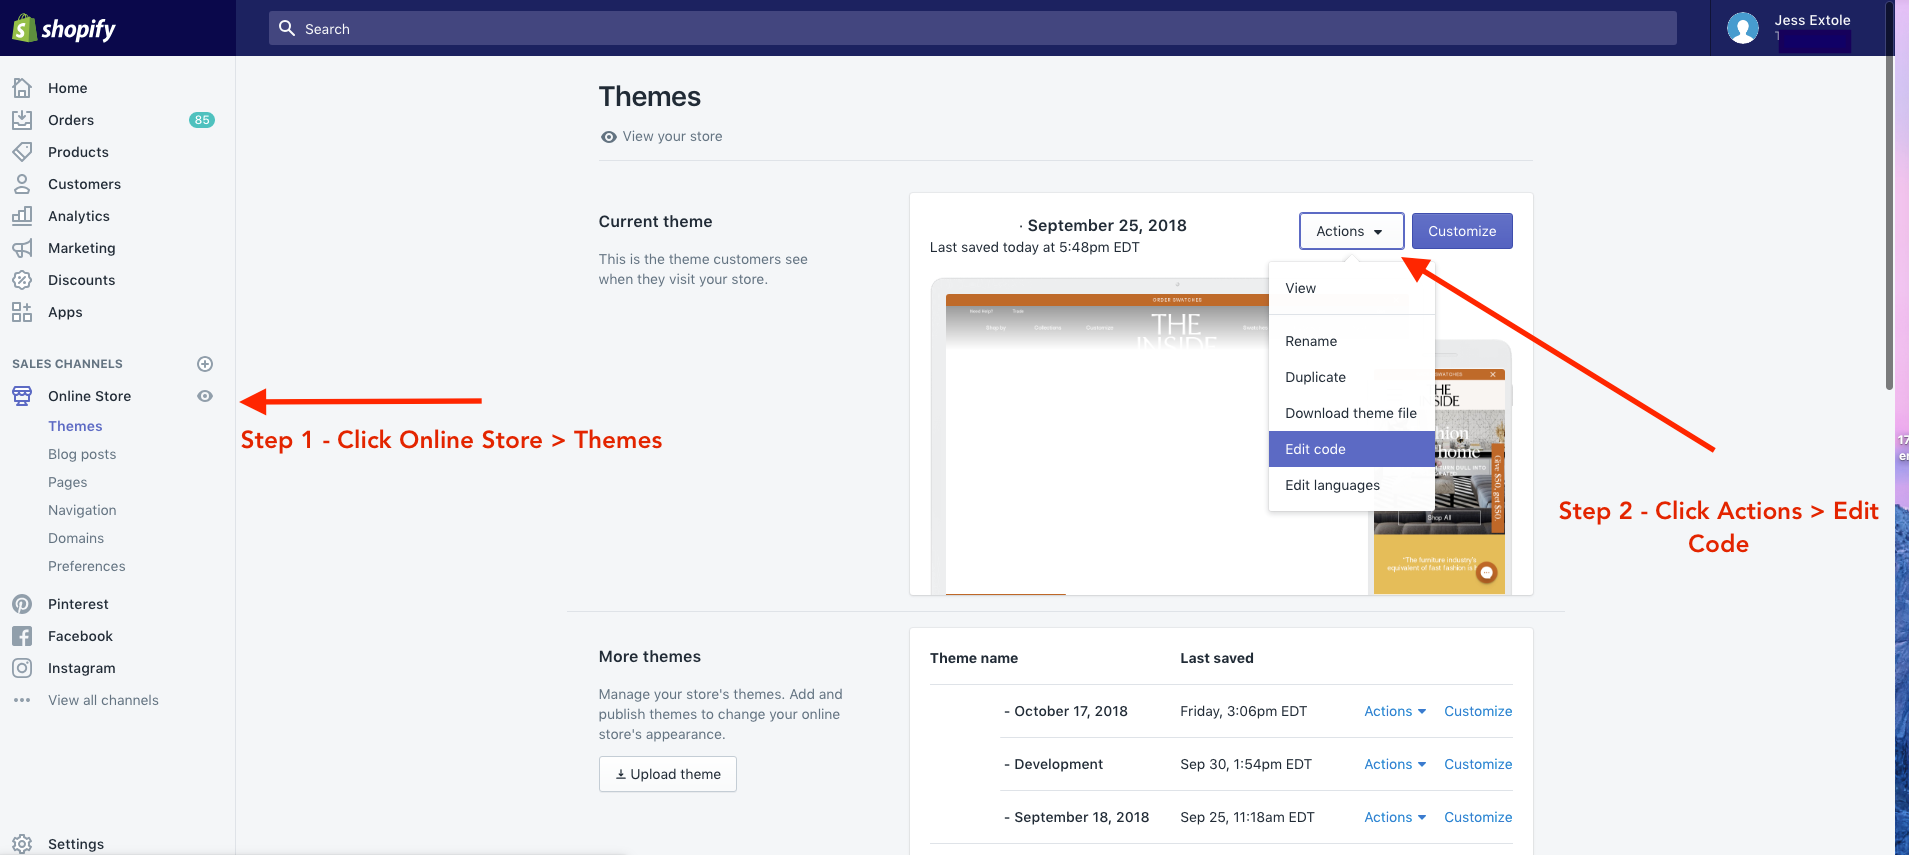
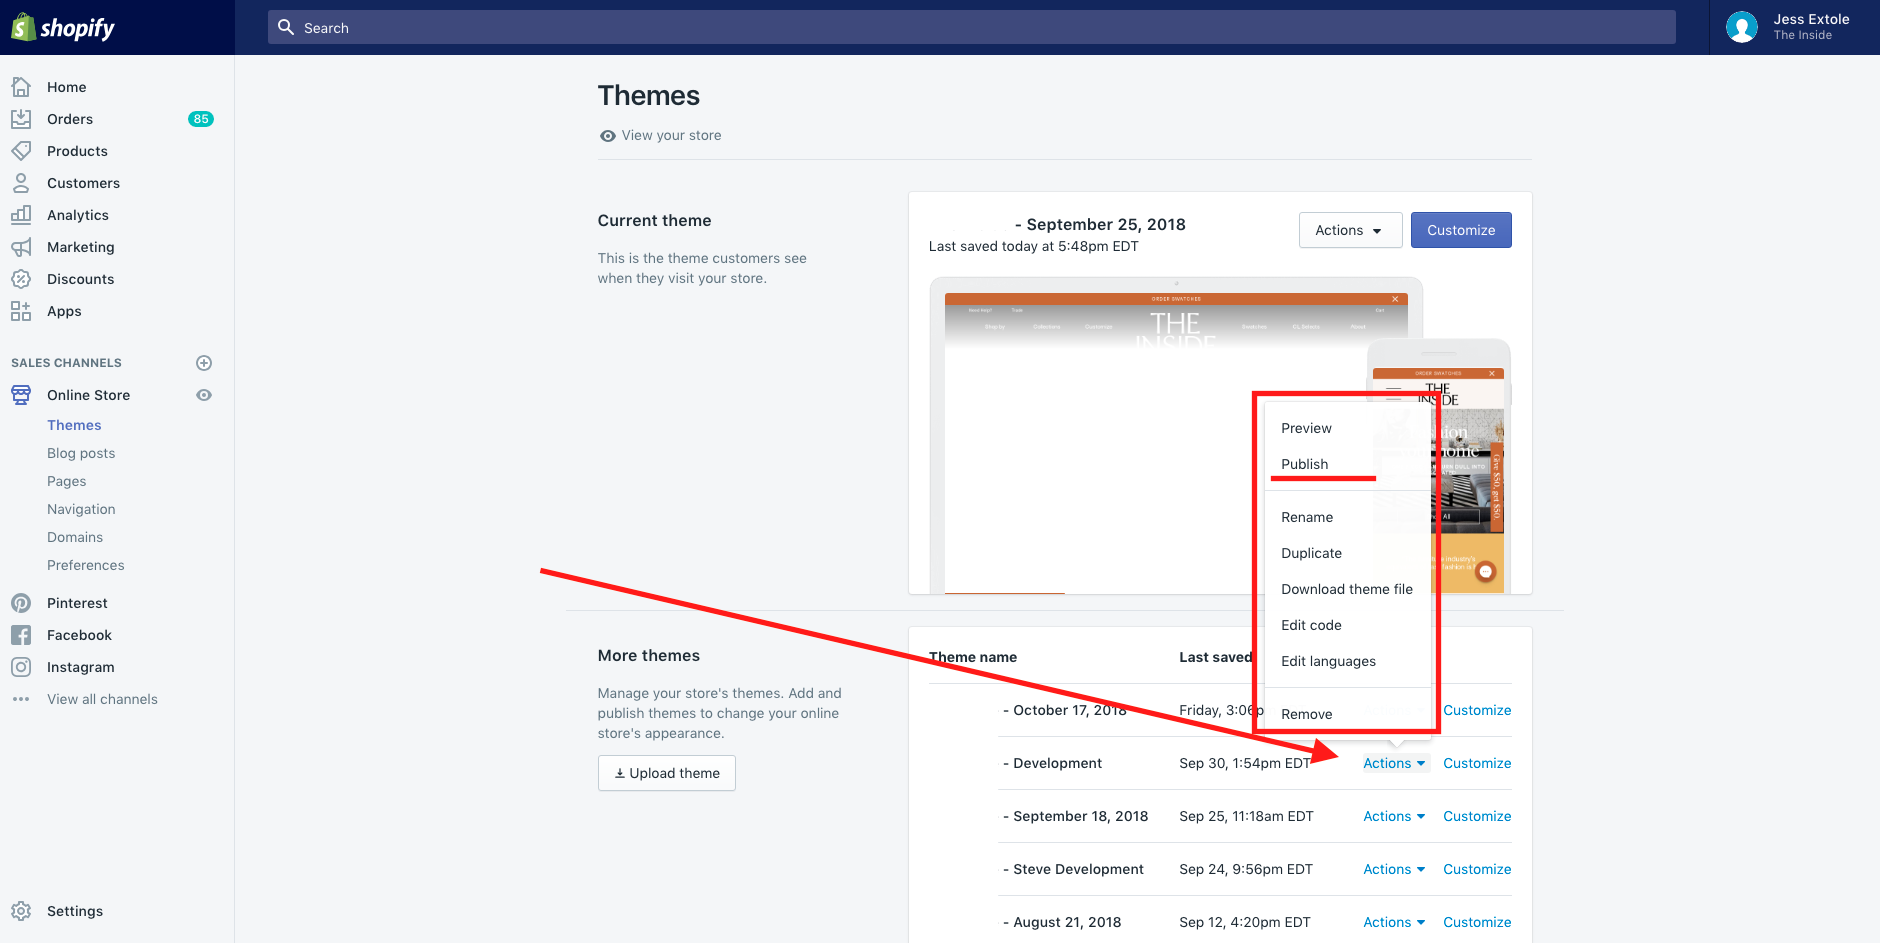
The 'Current' theme is the theme that is currently being presented in the live site and the 'Development' theme is the theme where the tags should be tested first. You can get to the themes by clicking Online Store > Themes. Once you see all themes, click on Actions > Edit Code to edit the theme's code.
Add Extole core.js and Zone Tags Inside Liquid Themes
Liquid is an open-source template language created by Shopify and written in Ruby that allows anyone to edit the code directly in the liquid template or layout page.
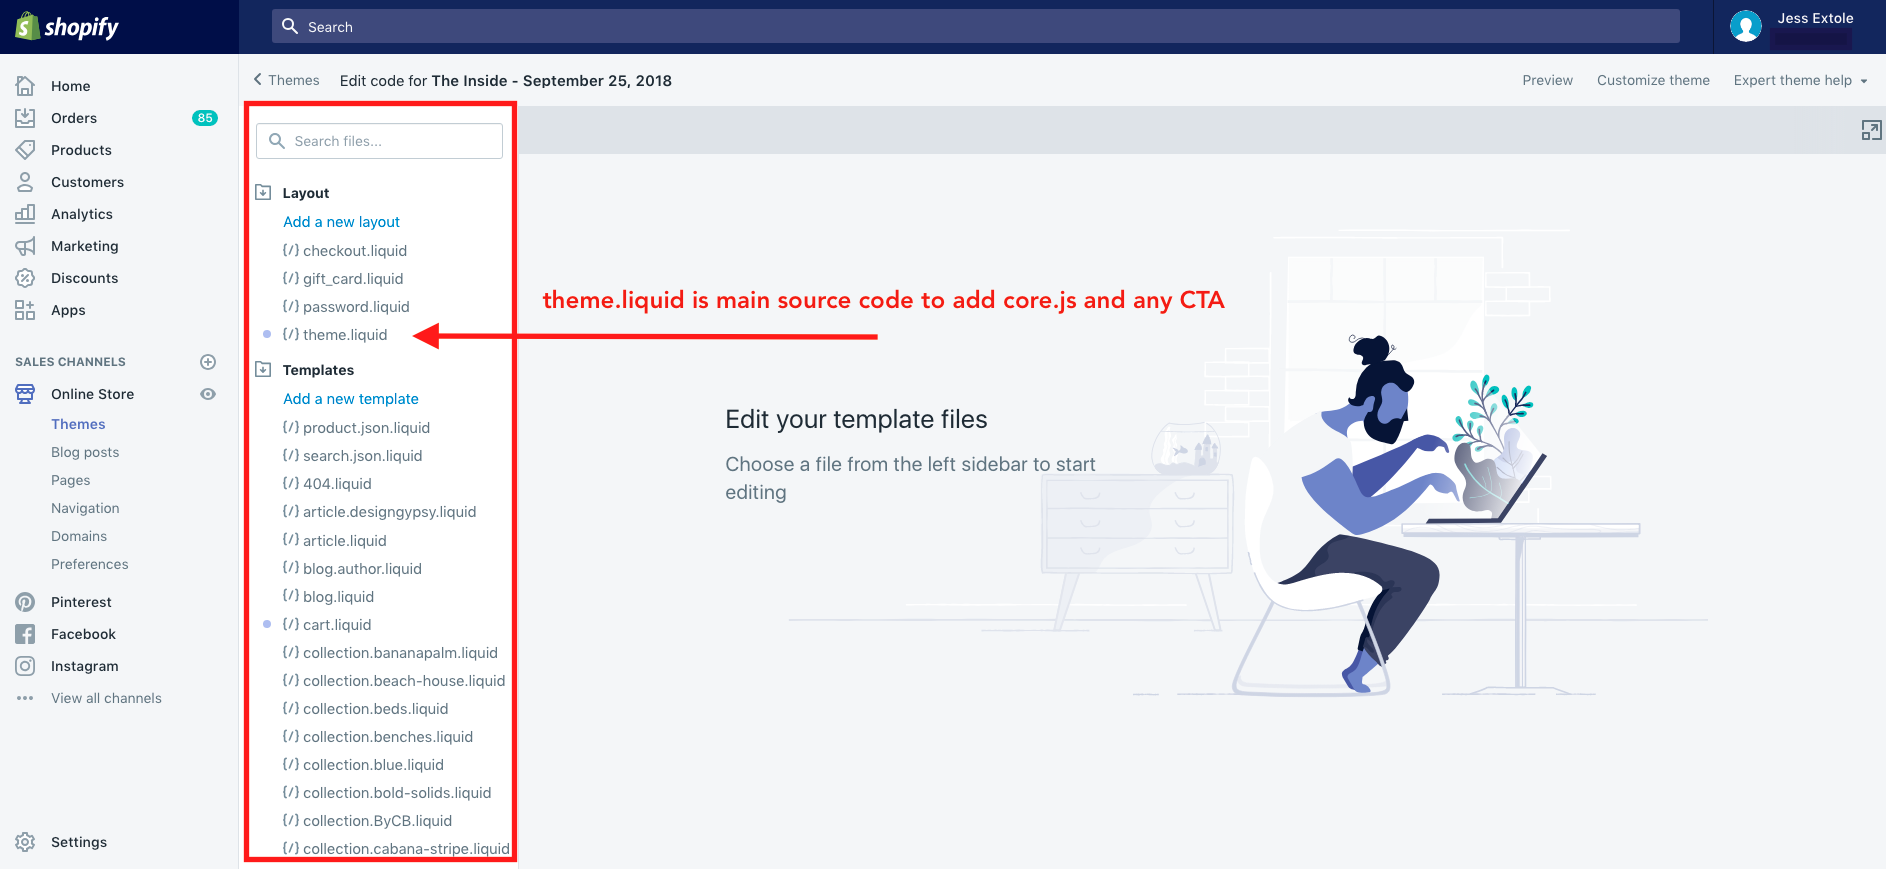
You will first add Extole’s core.js to all of the Shopify pages by putting the reference to core.js in the master liquid theme called "theme.liquid" inside of the <head></head> tags. Note that refer.brand.com is a reference to your branded and CNAMEd Extole domain:
<!-- BRANDED -->
<script type="text/javascript" src="https://share.brand.com/core.js" fetchpriority="high" async></script>

<!-- UNBRANDED UNTIL CNAME IS COMPLETE -->
<script type="text/javascript" src="https://brand.extole.io/core.js" fetchpriority="high" async></script>
Next, add Extole zone tags for each call-to-action in your marketing plan. Often, Extole clients will use our overlay call-to-action, which is used in this document as an example of how to implement that type of Extole tag:
<span id='extole_zone_overlay'></span>
<script type="text/javascript">
  /* Start Extole */
  (function(c,e,k,l,a){c[e]=c[e]||{};for(c[e].q=c[e].q||[];a<l.length;)k(l[a++],c[e])})(window,"extole",function(c,e){e[c]=e[c]||function(){e.q.push([c,arguments])}},["createZone"],0);
  /* End Extole */
    extole.createZone({
        name: "overlay",
        element_id: "extole_zone_overlay",
        app_type: "shopify"
    });
</script>
Add Extole CTA Zone Tags
A call-to-action (CTA) zone represents a particular section of content real estate on your site pages that allows your team to engage your advocates with multiple campaigns/creatives/messages. A zone to the Extole platform is similar to a zone with an ad server, site analysis tool, or testing framework.
An Extole campaign includes the following set of standard zone names:
global_headerglobal_footerconfirmationoverlay
To add any CTA tag to all of the pages, you will need to look for the liquid template that you want to add the tag in. For example, global_footer can be added to the footer.liquid template just as is:
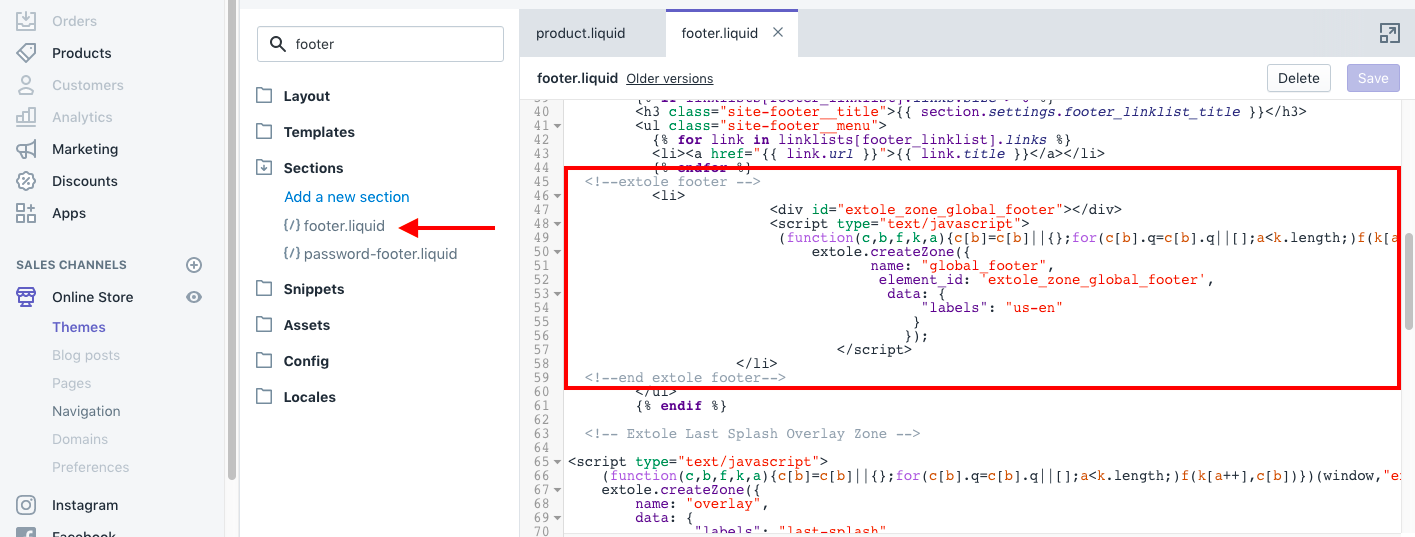
<span id="extole_zone_global_footer"></span>
<script type="text/javascript">
  /* Start Extole */
  (function(c,e,k,l,a){c[e]=c[e]||{};for(c[e].q=c[e].q||[];a<l.length;)k(l[a++],c[e])})(window,"extole",function(c,e){e[c]=e[c]||function(){e.q.push([c,arguments])}},["createZone"],0);
  /* End Extole */
   extole.createZone({
     name: 'global_footer',
     element_id: 'extole_zone_global_footer'
  });
</script>
Create a Conversion Pixel
Follow these steps to create and configure the custom pixel for conversion tracking.
- Access the Shopify Admin Panel
- Select Settings from the sidebar.
- Click on Custom Events.
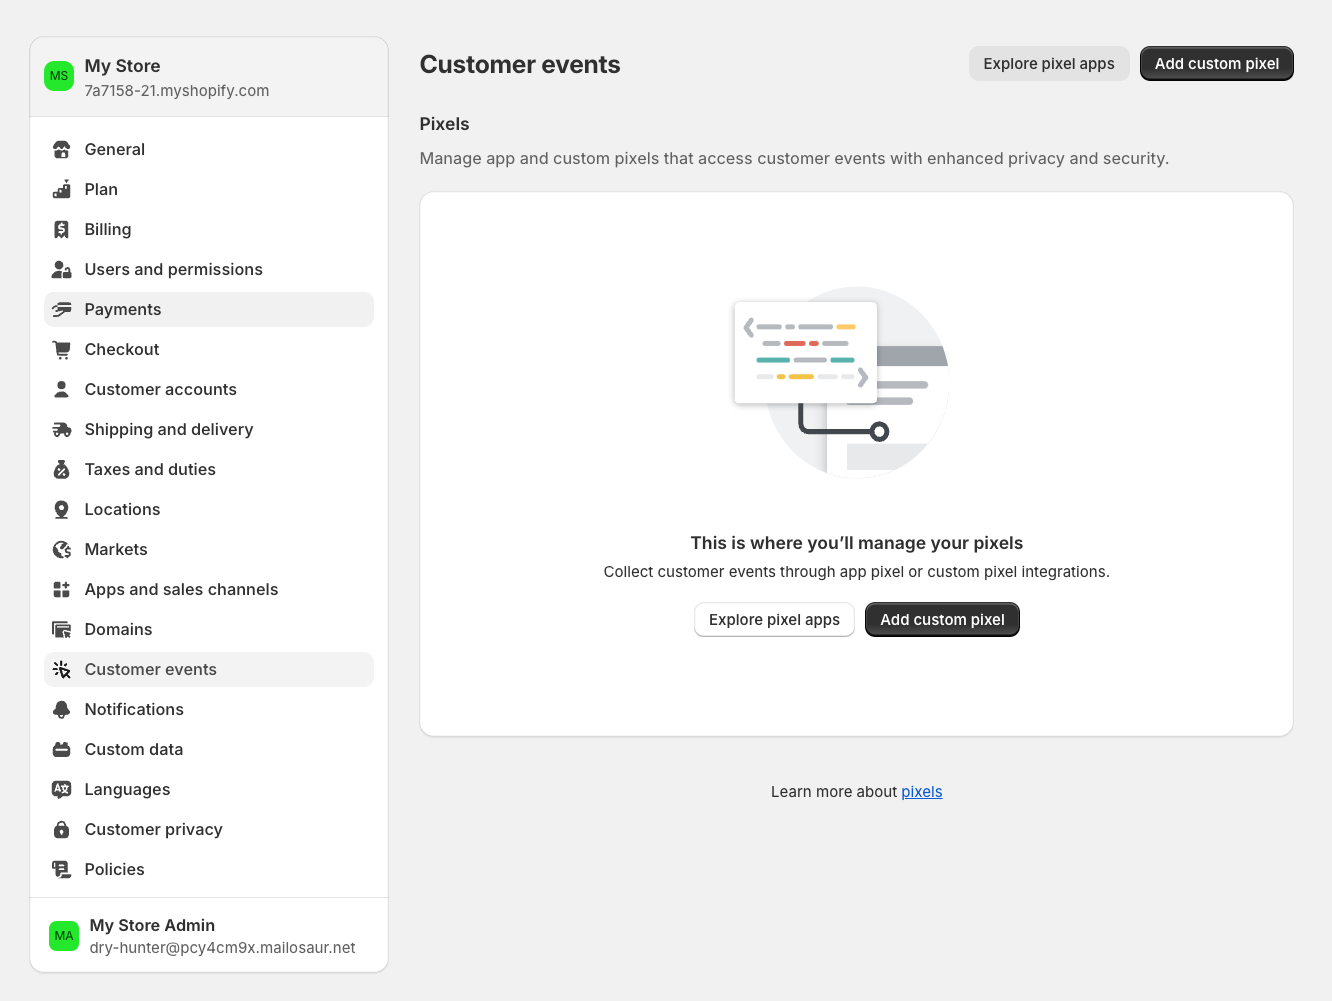
- Click Add Custom Pixel.
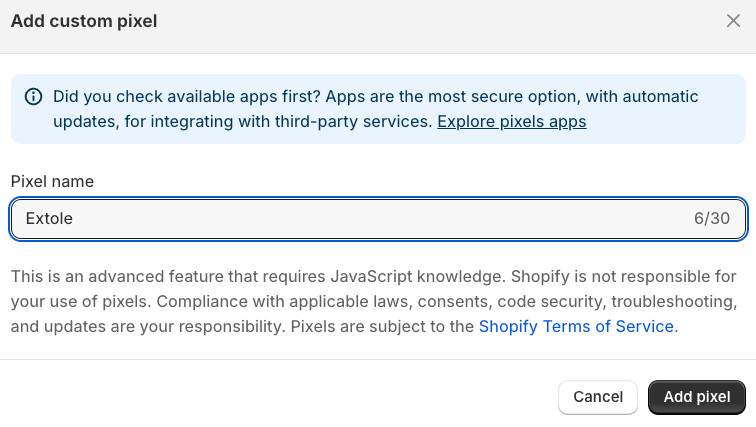
- Provide a name for your pixel.
-
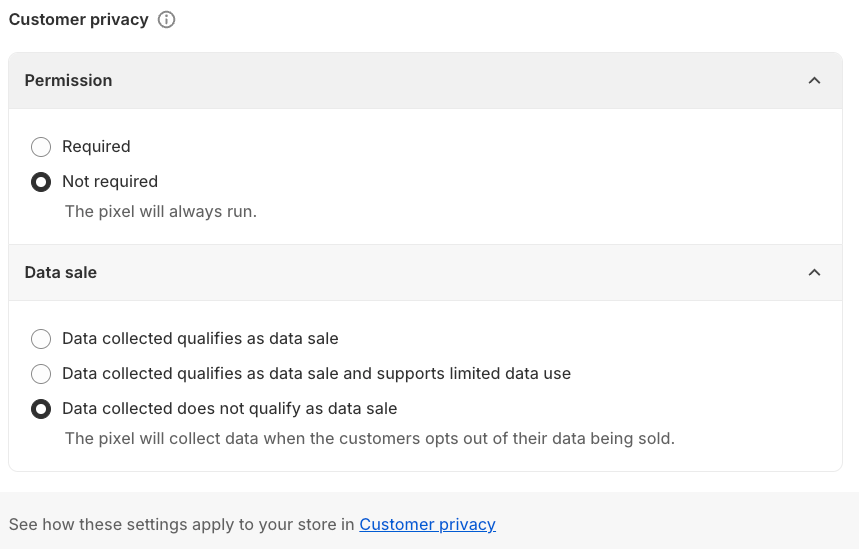
Configure the customer privacy settings as follows:
- Permission: Not required
- Data sale: Data collected does not qualify as data sale
-
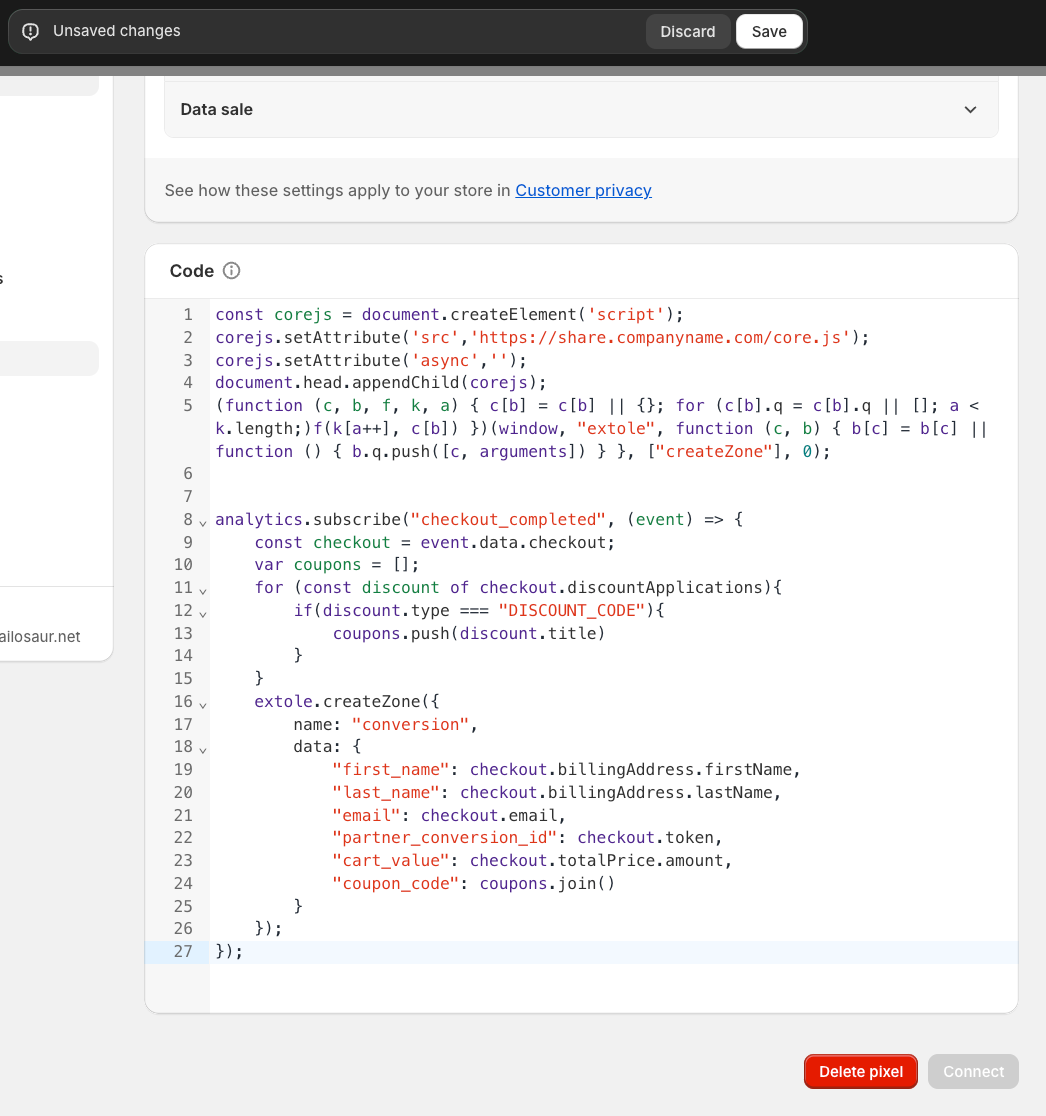
Insert the Pixel Code:
- Copy the following code snippet:
- Make sure to replace the
share.brand.comwith your url from above.
const corejs = document.createElement('script');
corejs.setAttribute('src','https://share.brand.com/core.js');
corejs.setAttribute('async','');
document.head.appendChild(corejs);
(function(c,b,f,k,a){c[b]=c[b]||{};for(c[b].q=c[b].q||[];a<k.length;)f(k[a++],c[b])})(window,"extole",function (c,b){b[c]=b[c]||function (){b.q.push([c,arguments])}},["createZone"],0);

analytics.subscribe("checkout_completed", (event) => {
    const checkout = event.data.checkout;
    var coupons = [];
    for (const discount of checkout.discountApplications){
        if(discount.type === "DISCOUNT_CODE"){
            coupons.push(discount.title)
        }
    }
    extole.createZone({
        name: "conversion",
        data: {
            "first_name": checkout.billingAddress.firstName,
            "last_name": checkout.billingAddress.lastName,
            "email": checkout.email,
            "partner_user_id": event.clientId,
            "partner_conversion_id": checkout.order.id,
            "cart_value": checkout.totalPrice.amount,
            "coupon_code": coupons.join()
        }
    });
});
Remove Existing checkout.liquid Customizations
checkout.liquid CustomizationsAfter implementing the new pixel, clients should remove existing Extole code from the additional scripts section to prevent duplicate firing.
Having both the new pixel and the existing checkout.liquid customizations can result in duplicate data being sent, which can cause inaccuracies in conversion tracking and analytics.
Removing the old code ensures that only the new pixel code is active, maintaining the integrity and accuracy of the collected data.
- Navigate to your Shopify admin panel.
- Go to Settings.
- Select Checkout.
- Locate the
additional scriptssection. - Remove any existing Extole code.
By following these steps, we aim to ensure a seamless transition for our clients while maintaining the quality and functionality of their Shopify checkouts.
Preview and Publish Your Changes
To preview and test the Extole tags you’ve added, click on the Theme name's actions to whether you want to 'Preview' or 'Publish' . Once you click on ‘Publish’, all draft changes will be pushed. You will need to apply the same code change to the current (live) theme once QA of all tags and the referral flow have been approved in the Development theme.
Updated about 2 months ago
