Manage Your SSL Certificate
Overview
Your referral domains are integral to your program's success. Every time your advocates interact with your program your brand is reinforced by the exposure it receives via the advocate share links generated for your advocates. That is why it is important to ensure your advocate's cybersecurity.
Extole will automatically generate a SSL certificates for your program and manage all security aspects of your program by default; however, if your company's policy does not allow others to generate SSL certificates on behalf of your domains, Extole has two options to generate certificates on your end.
Option 1: Use an Extole-generated CSR
The general process for this is:
- Extole generates the CSR and provides it to your team.
- You sign the CSR with your Certificate Authority.
- You provide the Certificate Chain and Public Key back to Extole.
- Extole installs the certificates.
Option 2: Generate and sign a CSR then upload into Extole
Alternatively, you can manage the entire process on your end. This looks as follows:
Generate a CSR Locally Using OpenSSL
Please NoteIf you don't already have OpenSSL installed, you will need install Homebrew before installing OpenSSL.
We first need to generate a private key with which to authenticate our CSR. On the command line enter the following sequence of commands:
openssl genrsa -out yourdomain.key 2048The command above generates an RSA key named yourdomain that is 2048 bits long. Now that we have generated our key we will use it to generate the CSR.
openssl req -new -key yourdomain.key -out yourdomain.csrAs part of the CSR generation process, you will be asked to provide information regarding your organization. Use the table below as a guide to provide the necessary information.
| Field | Description |
|---|---|
| Country Name (2 letter code) | The two-letter country code where your company is legally located. |
| State or Province Name (full name) | The state/province where your company is legally located. |
| Locality Name (e.g., city) | The state/province where your company is legally located. |
| Organization Name (e.g., company) | Your company's legally registered name (e.g., YourCompany, Inc.). |
| Organizational Unit Name (e.g., section) | The name of your department within the organization (press Enter to leave this field blank). |
| Common Name (e.g., server FQDN) | Here, you will provide your branded, Extole referral domain which is usually in the form of refer.mycompany.com. You can find your branded referral domain in the Program Domains section of your Tech Center page. |
| Email Address | Your email address (press Enter to leave this field blank). |
| A challenge password | Leave this option blank (press Enter). |
| An optional company name | Leave this option blank (press Enter). |
Example
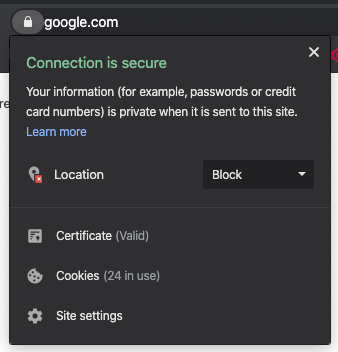
To get the information listed in the table above, you can go to your company's website and click the lock icon in your browser's address bar. The following example uses google.com.

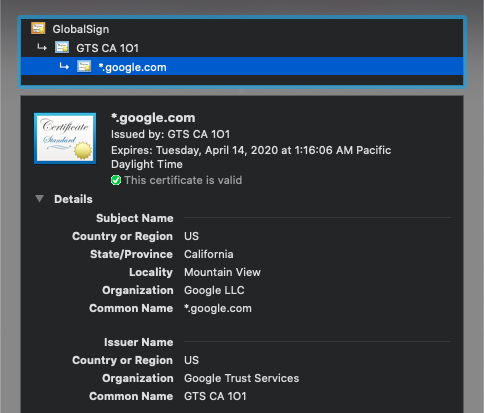
Then click the certificate icon to get the company information.

Submit the CSR to a Certificate Authority
Once you have completed the step above, you are ready to submit your CSR (the file named yourdomain.csr) to a Certificate Authority (i.e., Digicert, Thawte, Verisign, Comodo, etc). The CA will return to you a public certificate along with the certificate chain.
While you wait for the CA to return the signed certificate, make sure to save the RSA key we created in the previous step in a secure place (the file named yourdomain.key) as you will need this key in the next step.
Convert the Private Key to PCKS#8 Format
Once we have received the signed certificate, we are ready to convert our RSA key to PCKS#8 format. To do so, enter the command below:
openssl pkcs8 -topk8 -inform PEM -in yourdomain.key -out yourdomain.pkcs8 -nocryptThis command will generate a new file called yourdomain.pkcs8, which is the key to be used to authenticate the certificate.
Next, we will open the file, copy the content and paste it into our My.Extole dashboard.
cat yourdomain.pkcs8Alternatively, you can choose to open the file with a text editor and copy the contents that way. The beginning and end of the file must be delimited by the following lines:
\-----BEGIN PRIVATE KEY-----

\-----END PRIVATE KEY-----
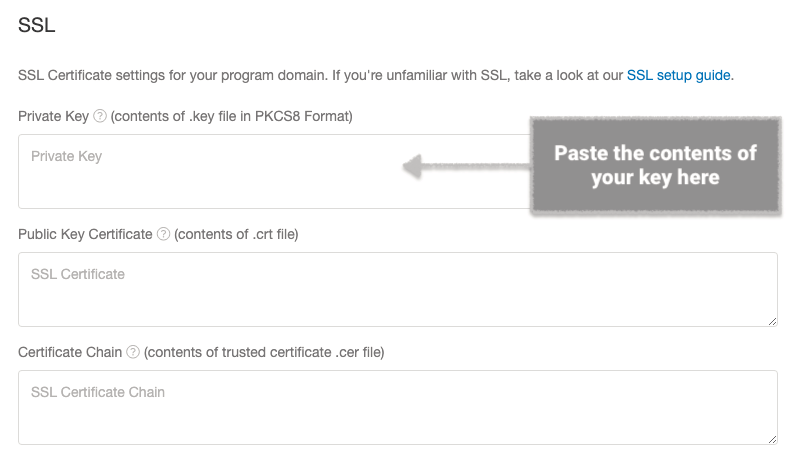
Make sure to copy all the contents, including the lines above, then head to your Tech Center and click the edit icon next to your active domain to access the SSL portion. An overlay window will pop up.

In the pop-up window, look for the Private Key section and paste the contents of your PKCS8. Then, click the blue Save button at the top of the window to save the key.

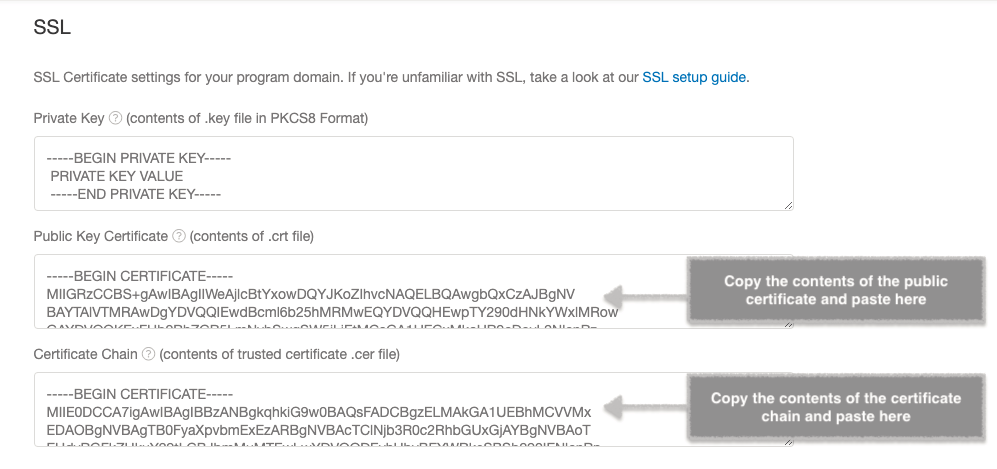
Important NoteAs a security mechanism, the contents of the newly pasted key will not be shown after saving. Instead, the contents of the key will be replaced by the string
PRIVATE KEY VALUE.
-----BEGIN PRIVATE KEY-----
PRIVATE KEY VALUE
-----END PRIVATE KEY-----
Upload the Chain Certificate to Your My Extole Account
The CA should have sent you a public key certificate as well as the certificate chain. The certificate chain contains the SSL Certificate and Certificate Authority (CA) Certificates, that enable the receiver to verify that the sender and all CA's are trustworthy. Paste those in the corresponding sections and click Save.

Verify the Changes By Testing Your Program Flow
You should ensure all Extole content is being displayed correctly on your site by following your program flow. You will know everything is working correctly if your CTAs, Share Experience or Microsite, Friend Lading Experience, and so on are all displaying without any issues.
Updated 3 months ago
