BigCommerce
Place CTAs for your Extole programs in your BigCommerce storefront, track customer activity, and reward engagement with BigCommerce discounts.
Overview
Launch dynamic programs like Refer A Friend, Drop A Hint, Welcome Offer, and more with the Extole and BigCommerce integration. By following this guide, you can place targeted CTAs and experiences throughout your storefront, track customer activity in real-time, and reward customers using BigCommerce discounts.
Prerequisites
| Requirement | Description |
|---|---|
| Extole Account | You’ll need an Extole account to leverage this integration. |
| BigCommerce Account | You'll need a BigCommerce account with Store Owner permissions enabled. |
| Extole Access Token | You'll need to generate a long-lived access token in order for BigCommerce to use Extole's authenticated RESTful APIs. Generate your token within the Security Center of your Extole account. |
| Branded Program Domain | You'll need to create a branded Program Domain in your Extole account. More information about Program Domains. |
Integration
Begin the integration from the Partners page in your Extole account or from the BigCommerce app marketplace by clicking "Install."
Then, follow the steps below.
Step 1: Configure Extole Core Settings
First, configure your core settings to begin adding Extole tags to your BigCommerce storefront.
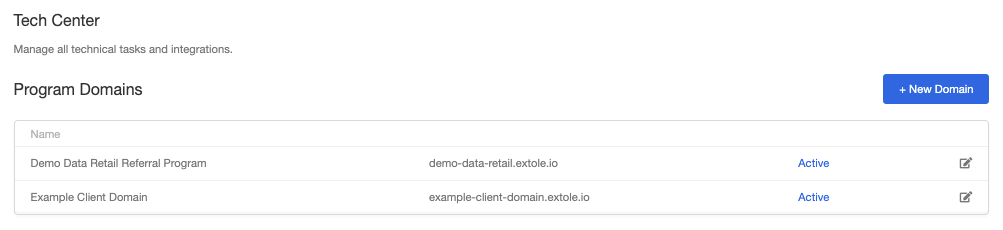
Branded Program Domain
Find your Branded Program Domain in the Tech Center of your Extole account under Program Domains. It's usually in the format of share.brand.com.
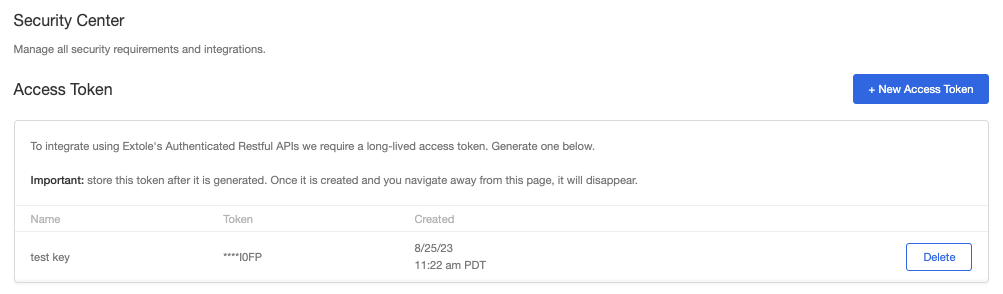
Extole Access Token
To generate your Extole Access Token, go to the Security Center and follow the instructions to create a new token. Copy and save the access token in a safe place, as you won’t be able to access it beyond this point.
Then paste the access token in the Extole app in BigCommerce. Make sure the Extole Core Settings are enabled.

Step 2: Configure Marketing Tags
After configuring your core settings, you can begin to add CTAs by integrating Extole's marketing tags into your BigCommerce store.
Enable Marketing Tags
Navigate back to Extole to begin enabling the Marketing tags for the CTAs that you would like to place throughout your store. These can be found in the Campaign Editor for your program in the Marketing tab.
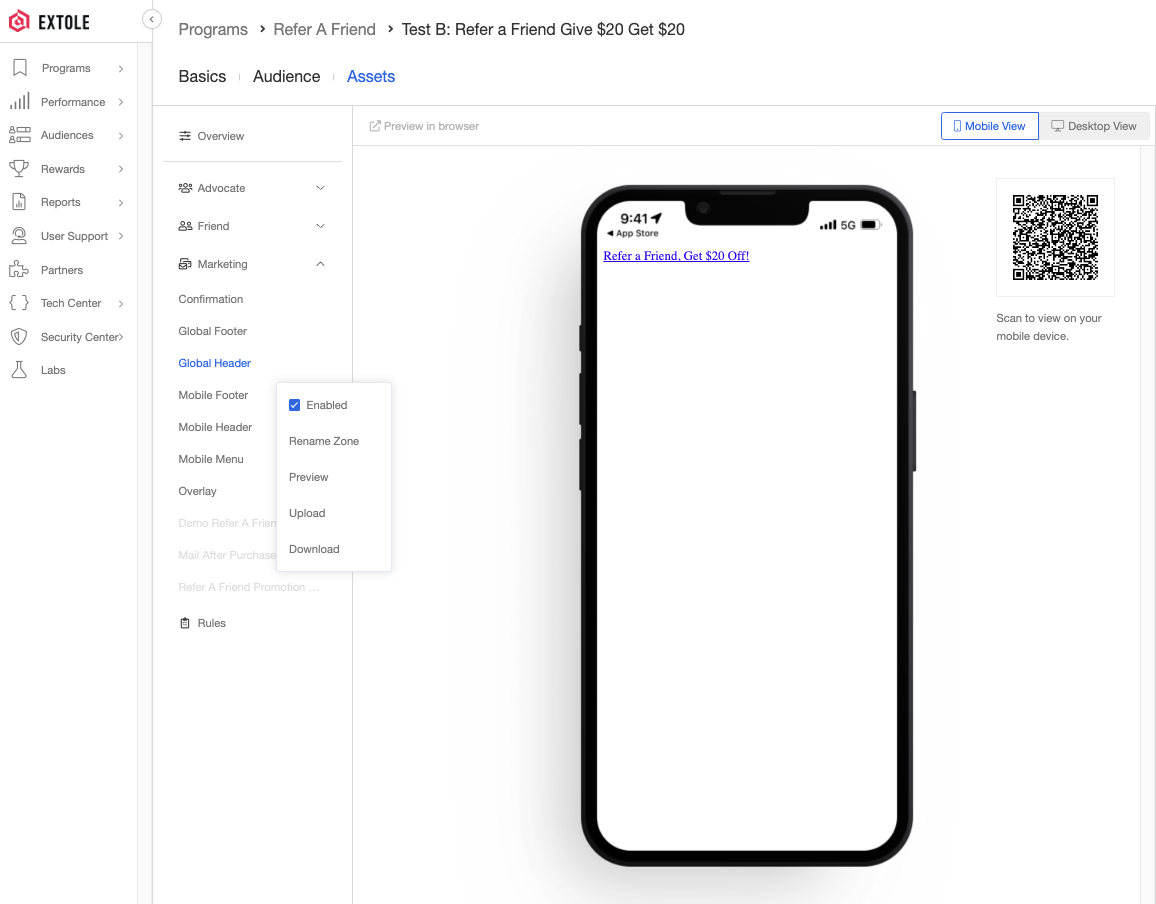
Once you've enabled the marketing placements in your Extole account, return to your BigCommerce account to begin placing the marketing tags throughout your store.
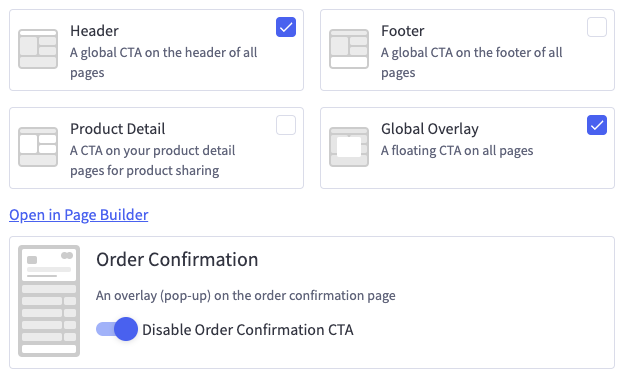
Select the Marketing Tags wherever you'd like to market your program—Global Header, Global Footer, etc.
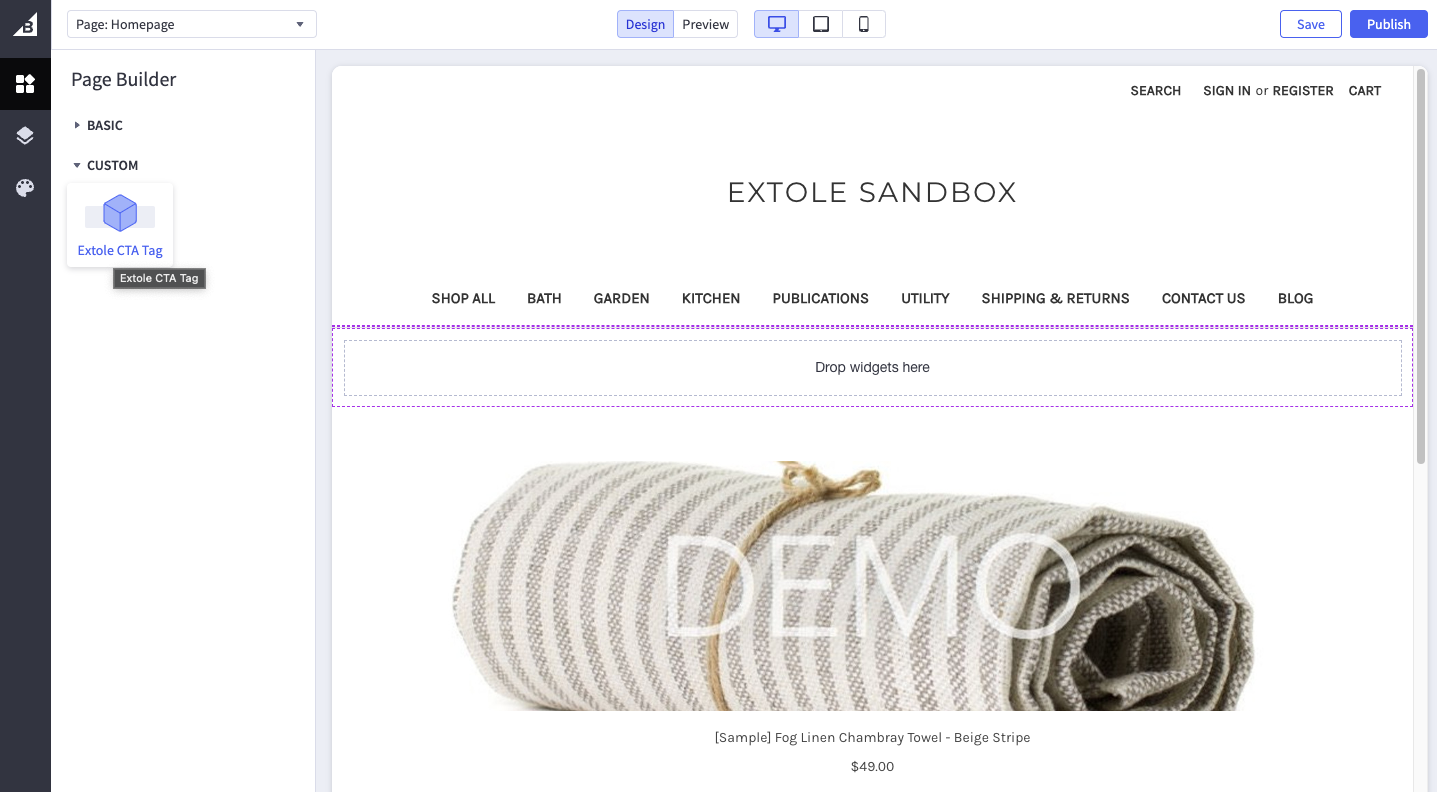
Next, in order to display Extole content like "Refer and get $20" on your BigCommerce store, you'll need to go to the Page Builder in your BigCommerce account to place the Extole CTA tags on your web pages.
Simply drag and drop the Extole CTA Tag to the places on the page where you want them to appear.
Once you've placed an Extole CTA Tag, a new menu will appear on the left. Select the type of tag you are configuring from the Zone dropdown.
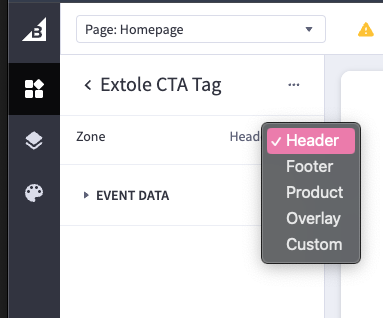
You can also modify the event data that’s passed through the tags at this point.
While the marketing tags will automatically display in the corresponding area of your storefront, they can be dragged and dropped anywhere and re-named accordingly using the drop-down and custom zone fields in Page Builder.
Custom Data in Marketing Tags
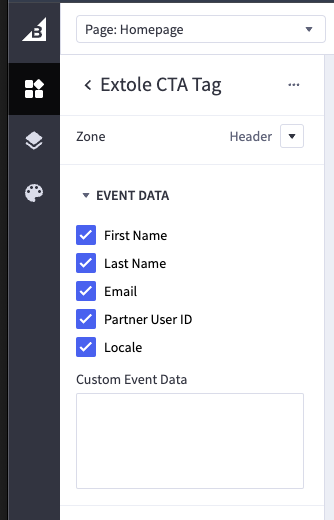
When configuring Extole's marketing tags, data such as email, first_name, last_name, partner_user_id, and locale is collected by default depending on the user's logged in state. You also have the option to specify any custom data for additional tracking and segmentation capabilities.
You can specify custom data in your Extole CTA Tags in the Custom Event Data field.
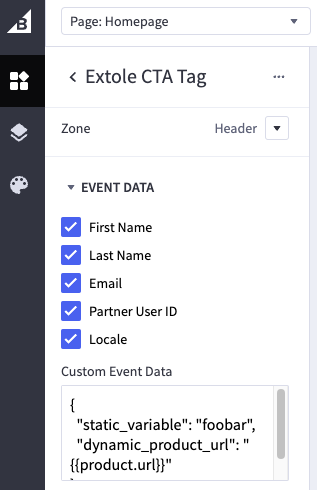
The custom data should be formatted as key-value pairs within a JSON object. You can include both static and dynamic data points.
Example of Custom Data Format:
{
  "static_variable": "foobar",
  "dynamic_product_url": "{{product.url}}"
}
Step 3: Configure Rewards
Follow the instructions below to automatically create BigCommerce promotion code rewards for your various programs.
Create BigCommerce Promotion(s):
- Go to the Marketing > Promotions section in your BigCommerce admin panel.
- Create a new Promotion coupon code that will serve as a placeholder for the rewards that will automatically dispensed by Extole. Extole recommends setting a minimum purchase amount and restricting the promotion code to a single (1) use per customer.
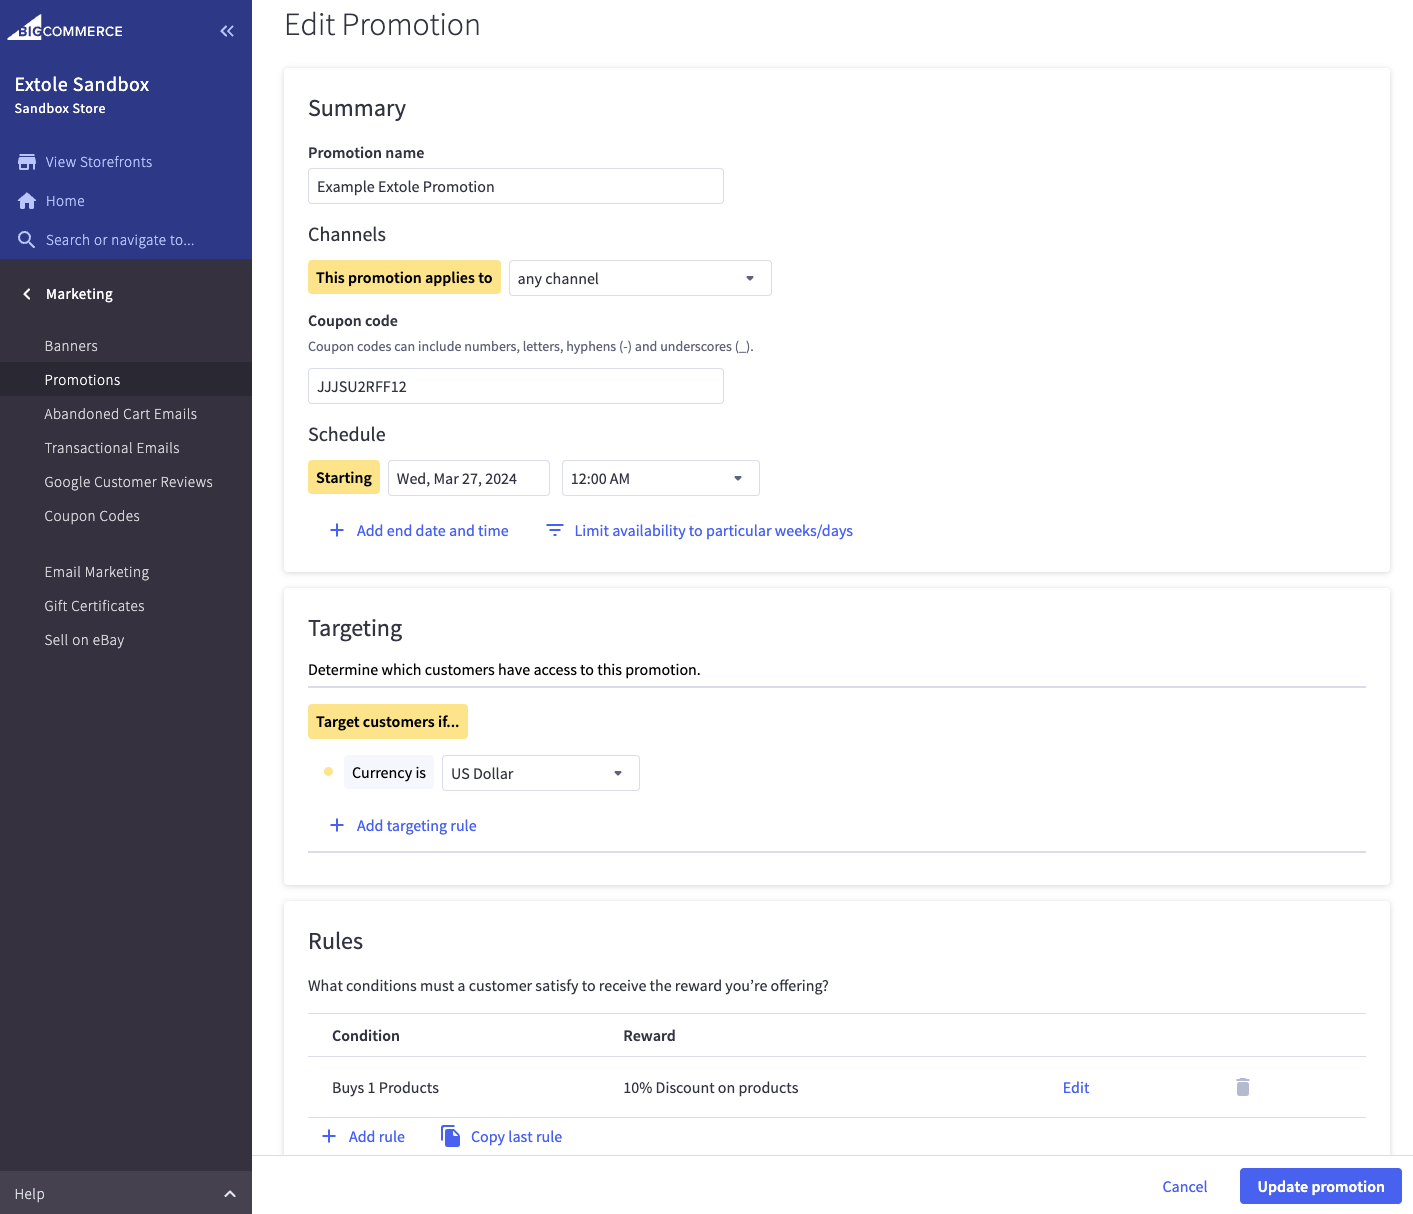
Important NoteIf you are using these discount codes for your referral program, Extole recommends creating separate Promotion Codes for advocates and friends.
Configure your Reward(s) in Extole:
- Log into your Extole account to verify that the BigCommerce integration was successfully installed on the Partners page.
- Navigate to the Rewards section.
- Select the BigCommerce Coupons from the Reward Supplier and make sure to indicate a Name for the reward and the Promotion ID for the Promotion you created in BigCommerce. The Promotion ID is the unique code that you can find in the promotion code details in BigCommerce.
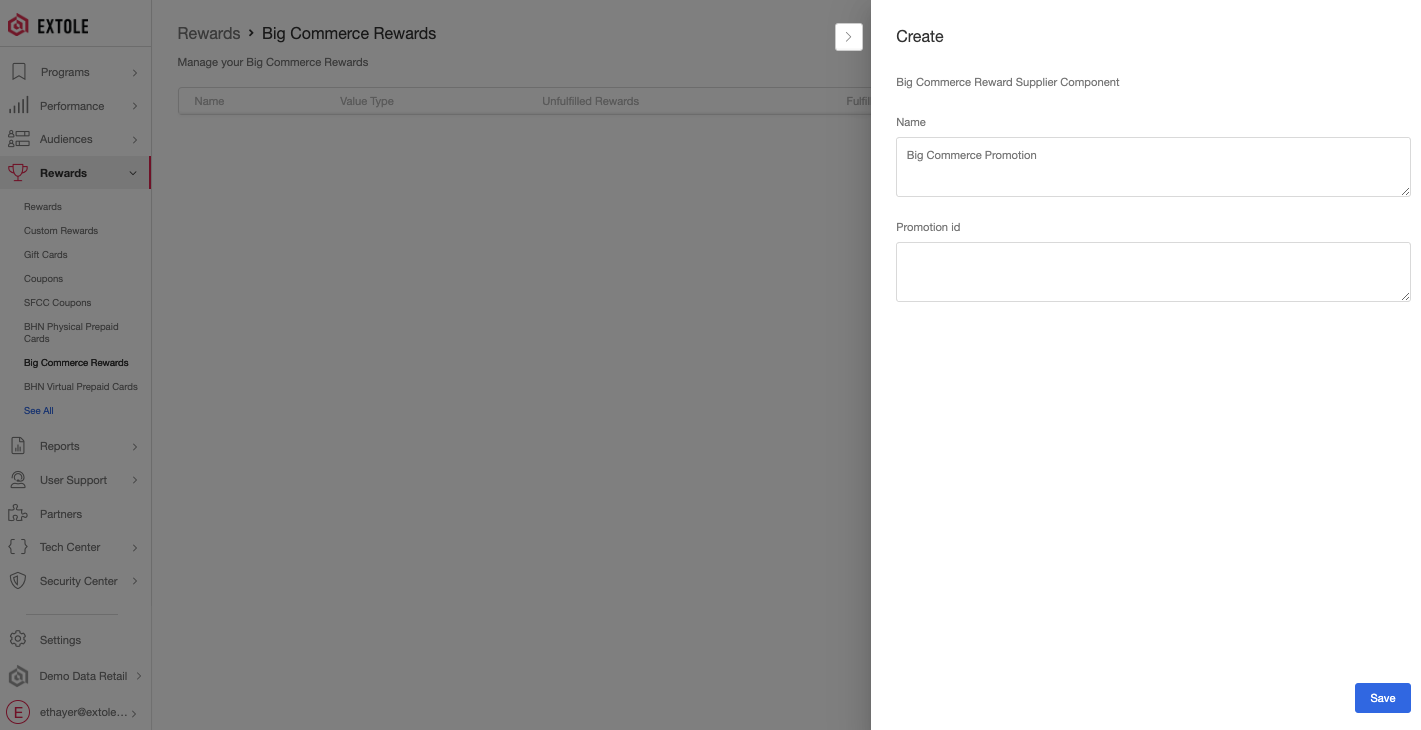
- Save the reward, add it to your Extole campaign, and you’re all set! The integration will automatically generate and issue a new random code each time a participant earns a reward on the configured campaign.
Advanced Configuration
After configuring your core settings, marketing tags, and rewards, you can optionally adjust the notification events that are sent to Extole every time an order is created, fulfilled, and canceled in BigCommerce. These events enable functionality like tracking, attribution, rewarding, reporting, and segmentation in the Extole platform, so it's recommended to enable all notification events.
Notification Events
Real-time notifications allow you to track key events in your program, such as when an order is created, fulfilled, or canceled. You can adjust your settings in your BigCommerce account within Advanced section of the Extole app.
- Enable Order Created Notification: This required notification triggers an event when a customer places an online order.
- Enable Order Fulfilled Notification: This notification triggers an event whenever an order has shipped. This is particularly useful if you want to trigger rewards in Extole once an order has actually shipped.
- Enable Order Canceled Notification: This notification triggers an event whenever an order is canceled. For example, in the Extole platform, you can use this event to create a rule that rewards customers 5 days after they have placed their order, as long as they haven’t canceled their order yet.
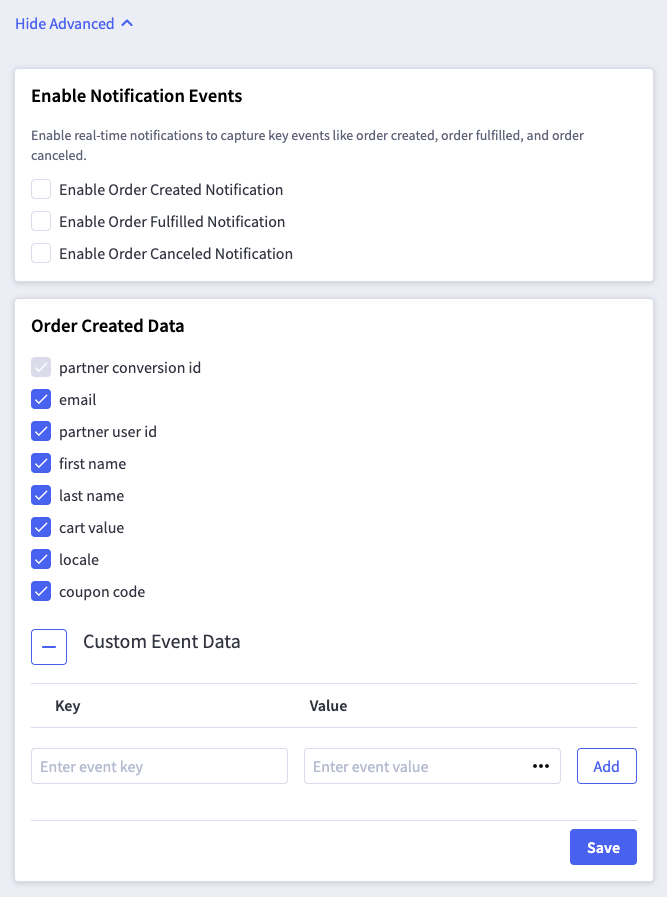
Data Parameters for Order Created Event
When an order is created, you can specify which data parameters are sent to Extole in your BigCommerce account in the Advanced section of the Extole app. These data parameters enable essential tracking and reporting in the Extole platform.
partner_conversion_id: This parameter is essential for tracking. It's selected by default and cannot be deselected. It typically represents the order number or a unique identifier for the transaction.- Additional data parameters are included by default, such as
email,partner_user_id,first name,last name,cart_value,locale, andcoupon_code: These parameters provide more context about the customer and the transaction, which can be useful for segmenting and analyzing your data.
Custom Event Data
If you want to track additional data that is specific to your business, you can indicate custom key-value pairs. For example, you might want to track the product category of the purchased items or the marketing channel that led to the referral.
Preview and Publish Your Changes
Once you've configured everything, it's important to preview your BigCommerce site to see how each Extole CTA Tag and notification event looks and functions. You can make adjustments to ensure that everything aligns with your brand and provides a seamless user experience. Once you click Publish, all draft changes will be applied.
Important NoteIf you need to change the content or visuals of your marketing tags, you'll need to do this in the Campaign Editor within the Extole platform.
Updated 6 months ago